74626191-469d2400-5192-11ea-9a7d-352d043e1f8d

A Step-by-Step Guide to Configuring GlusterFS for High-performance Storage

Introduction

In today’s data-driven world, efficient storage solutions are essential for managing large amounts of data. GlusterFS, an open-source distributed file system, offers a scalable and flexible solution for high-performance storage. This blog post will guide you through the step-by-step process of configuring GlusterFS, enabling you to harness its power to meet your storage needs effectively.

GlusterFS

Prerequisites

Before we dive into the configuration process, make sure you have the following prerequisites in place:

  • Multiple Linux servers (nodes) running a compatible operating system (e.g., CentOS, Ubuntu, or Debian).
  • A reliable network connection between the nodes.
  • Root access or administrative privileges on each node.

Step 1: Install GlusterFS

The first step is to install GlusterFS on each node. Follow these steps:

  • Update your system’s package repository using the appropriate command for your Linux distribution (e.g., sudo apt update or sudo yum update).
  • Install GlusterFS using the package manager (e.g., sudo apt install glusterfs-server or sudo yum install glusterfs-server).
  • Start and enable the GlusterFS service (e.g., sudo systemctl start glusterd and sudo systemctl enable glusterd).

Step 2: Set Up Peer Relationship

To create a GlusterFS storage cluster, you need to establish peer relationships between the nodes. Follow these steps for each node:

  • Identify the IP addresses or hostnames of all the nodes.
  • Use the gluster peer probe command to connect each node to the others (e.g., sudo gluster peer probe <IP/hostname>).
  • Verify the peer status using sudo gluster peer status.

Step 3: Create and Mount Gluster Volumes

Once the peer relationships are established, you can create Gluster volumes for storing and accessing your data. Follow these steps:

  • Decide on a suitable volume type, such as replicated, distributed, striped, or distributed-replicated, based on your requirements.
  • Use the gluster volume create command to create a Gluster volume, specifying the volume type, the participating nodes, and the mount point (e.g., sudo gluster volume create <vol_name> <type> replica <N> <node1>:<brick_path1> ... <nodeN>:<brick_pathN>).
  • Start the Gluster volume using sudo gluster volume start <vol_name>.
  • Mount the Gluster volume on each node using the appropriate mount command (e.g., sudo mount -t glusterfs <node1>:<vol_name> <mount_point>).

Step 4: Test and Verify the Configuration:

To ensure that your GlusterFS configuration is working correctly, follow these steps:

  • Create a test file or directory on the mounted Gluster volume from any node.
  • Access the same file or directory from another node and verify that it is accessible and consistent across all nodes.
  • Perform read and write operations on the Gluster volume from different nodes to confirm that the data is synchronized.

Step 5: Advanced Configuration (Optional)

GlusterFS offers various advanced configuration options to optimize performance and enable additional features. Consider exploring options such as enabling client-side caching, enabling quota management, setting up geo-replication for data replication across different geographical locations, or integrating GlusterFS with other tools and services.

Here’s an elaboration of each step with code example for configuring GlusterFS:

Step 1: Install GlusterFS:

# Update package repository
sudo apt update

# Install GlusterFS server package
sudo apt install glusterfs-server

# Start and enable GlusterFS service
sudo systemctl start glusterd
sudo systemctl enable glusterd

Step 2: Set Up Peer Relationship:

# Establish peer relationship between nodes
sudo gluster peer probe <IP/hostname>

# Verify peer status
sudo gluster peer status

Step 3: Create and Mount Gluster Volumes:

# Create a replicated Gluster volume with two nodes
sudo gluster volume create myvolume replica 2 node1:/data/brick1 node2:/data/brick1

# Start the Gluster volume
sudo gluster volume start myvolume

# Mount the Gluster volume on each node
sudo mount -t glusterfs node1:/myvolume /mnt/glusterfs
sudo mount -t glusterfs node2:/myvolume /mnt/glusterfs

Step 4: Test and Verify the Configuration:

# Create a test file on the Gluster volume
echo "Hello, GlusterFS!" | sudo tee /mnt/glusterfs/test.txt

# Access the test file from another node
sudo cat /mnt/glusterfs/test.txt

# Perform read and write operations on the Gluster volume from different nodes
echo "New content" | sudo tee -a /mnt/glusterfs/test.txt
sudo cat /mnt/glusterfs/test.txt

Step 5: Advanced Configuration (Optional):

You can explore various advanced configuration options based on your requirements. Here are a few examples:

  • Enable client-side caching:
sudo gluster volume set myvolume performance.cache-size 1GB
sudo gluster volume set myvolume performance.cache-refresh-timeout 60
  • Enable quota management:
sudo gluster volume quota myvolume enable
sudo gluster volume quota myvolume limit-usage / 10GB
  • Set up geo-replication for data replication across different geographical locations:
sudo gluster volume geo-replication myvolume user@remote:/remote-path create push-pem
sudo gluster volume geo-replication myvolume user@remote:/remote-path start
  • Integrate GlusterFS with other tools and services (e.g., Samba, NFS, Kubernetes):
# Example: Configure GlusterFS as a shared storage backend for Kubernetes
# Install and configure GlusterFS Kubernetes plugin
kubectl create -f https://raw.githubusercontent.com/gluster/gluster-kubernetes/master/deploy/1.17/glusterfs-daemonset/kubernetes/gk-deploy-1.17.yaml

# Create a GlusterFS persistent volume
kubectl create -f https://raw.githubusercontent.com/gluster/gluster-kubernetes/master/examples/1.17/glusterfs-end-to-end/pvc.yaml

Conclusion

By following this step-by-step guide and using the provided code samples, you have successfully configured GlusterFS for high-performance storage. You can further explore advanced configuration options and integrations to customize GlusterFS based on your specific needs. GlusterFS offers a scalable and flexible solution for managing your data effectively.

images-2

OpenStack vs. Other Open-Source Cloud Platforms: A Comparison Guide

Cloud computing has become an integral part of modern business infrastructure, and it has become essential for many businesses to use cloud services to stay competitive. Cloud computing provides businesses with a flexible and scalable platform to host their applications, store data, and run their operations. However, many companies struggle with the high costs associated with cloud services, and they are looking for alternative solutions to manage their cloud computing infrastructure.

Open-source cloud computing is a popular alternative that has gained significant momentum in recent years. OpenStack is one of the leading open-source cloud computing platforms that is widely used by companies of all sizes to manage their cloud infrastructure. In this blog, we will provide an overview of OpenStack, and we will explain how it can benefit beginners who are interested in open-source cloud computing.

What is OpenStack?

OpenStack

OpenStack is an open-source cloud computing platform that provides businesses with a set of tools to manage their cloud infrastructure. It was first released in 2010, and since then, it has gained significant traction among businesses of all sizes. OpenStack is maintained by the OpenStack Foundation, a non-profit organization that is dedicated to promoting the use of open-source cloud computing.

OpenStack is designed to provide businesses with a flexible and scalable platform to manage their cloud infrastructure. It is composed of several components that work together to provide a complete cloud computing solution. Some of the key components of OpenStack include:

  1. Nova: A compute service that provides businesses with virtual machine (VM) management capabilities.
  2. Swift: An object storage service that provides businesses with the ability to store and retrieve data.
  3. Cinder: A block storage service that provides businesses with persistent storage for their VMs.
  4. Neutron: A networking service that provides businesses with network management capabilities.
  5. Horizon: A web-based dashboard that provides businesses with a user-friendly interface to manage their cloud infrastructure.

These components work together to provide businesses with a complete cloud computing platform that can be customized to meet their specific needs.

Benefits of OpenStack for Beginners

OpenStack provides beginners with a powerful platform to manage their cloud infrastructure. Here are some of the benefits that OpenStack provides to beginners:

  1. Scalable: OpenStack is designed to be scalable, which means that businesses can add or remove resources as needed. This allows businesses to scale their infrastructure based on their needs.
  2. Cost-effective: OpenStack is a cost-effective solution compared to proprietary cloud services. Since it is open-source, businesses do not have to pay for expensive licenses or vendor lock-in fees.
  3. Customizable: OpenStack is highly customizable, which means that businesses can tailor it to meet their specific needs. They can choose the components that they want to use and configure them according to their requirements.
  4. Open-source: OpenStack is open-source, which means that businesses have access to the source code and can modify it as needed. This provides businesses with a high degree of flexibility and control over their cloud infrastructure.
  5. Community support: OpenStack has a large and active community that provides support to beginners. This community is composed of developers, users, and vendors who are committed to promoting the use of open-source cloud computing

Getting Started with OpenStack

OpenStack

Getting started with OpenStack can be intimidating for beginners, but there are several resources available that can help. Here are some steps that beginners can follow to get started with OpenStack:

  1. Choose a distribution: There are several OpenStack distributions available, including Canonical, Mirantis, Red Hat, and SUSE. Beginners should choose a distribution that meets their specific needs.
  2. Set up a test environment: Beginners should set up a test environment to experiment with OpenStack. This can be done using virtual machines or a physical test environment.
  3. Learn the basics: Beginners should learn the basics of OpenStack, including the architecture, components, and terminology. They can refer to online documentation, tutorials, and training courses to learn more.
  4. Install and configure OpenStack: Beginners should install and configure OpenStack on their test environment. They can follow the installation and configuration guides provided by the distribution they chose.
  5. Create and manage resources: Beginners can create and manage resources such as VMs, storage, and networks using the OpenStack dashboard or command-line interface. They can also explore more advanced features such as load balancing, autoscaling, and container orchestration.
  6. Join the community: Beginners can join the OpenStack community to learn from other users and developers. They can participate in forums, mailing lists, and events to ask questions, share their experiences, and contribute to the community.

Conclusion

OpenStack is a powerful open-source cloud computing platform that provides businesses with a flexible and scalable solution to manage their cloud infrastructure. It is cost-effective, customizable, and provides beginners with a large and active community for support. By following the steps outlined in this blog, beginners can get started with OpenStack and take advantage of its many benefits. Open-source cloud computing is an exciting and rapidly evolving field, and OpenStack is a great platform to learn and experiment with.

linux containers

Exploring the Top Containerization Tools for Linux in 2023: A Comprehensive Guide

In recent years, containerization has become one of the most popular methods for deploying and managing software applications. Linux containers, in particular, have gained popularity due to their lightweight nature, ease of use, and flexibility. In this blog, we will explore Linux containers and some of the most famous containerization tools.

Linux Containerization

What are Linux Containers?

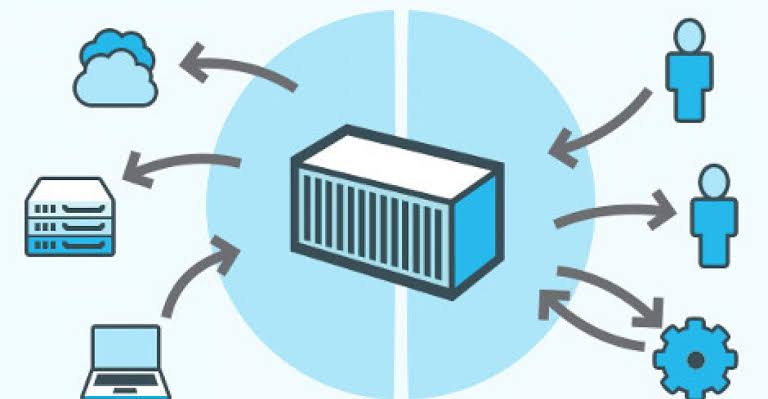
Linux containers are a form of operating system virtualization that allows multiple isolated user-space instances, or containers, to run on a single host. Each container shares the kernel of the host operating system but has its own isolated file system, process space, and network stack. Containers can be easily created, destroyed, and managed, making them an ideal tool for modern application deployment.

Containers offer several advantages over traditional virtualization methods. They are lightweight, fast, and highly portable. They also allow for better resource utilization, as multiple containers can run on a single host without impacting the performance of other containers.

Most Famous Containerization Tools

  • Docker: Docker is one of the most popular containerization tools available today. It provides a simple and easy-to-use interface for creating, managing, and deploying containers. Docker offers a vast repository of pre-built container images and tools to build your own custom images.
  • Kubernetes: Kubernetes is a container orchestration tool that provides a way to manage and scale containerized applications. It automates the deployment, scaling, and management of containerized applications across multiple hosts.
  • LXC/LXD: LXC (Linux Containers) is a lightweight and fast containerization tool that provides a simple and efficient way to create and manage containers. LXD is a higher-level interface to LXC that provides a more user-friendly experience.
  • Podman: Podman is a containerization tool that provides a simple and secure way to run containers on Linux. It is a daemonless container engine, which means it does not require a separate daemon to run containers.
  • Rkt: Rkt is a lightweight and secure containerization tool that provides a simple and efficient way to create and manage containers. It is designed to be fully compatible with existing container image formats, such as Docker.

Conclusion

Linux containers have become an essential tool for modern application deployment. They offer many advantages over traditional virtualization methods and are now supported by a wide range of containerization tools. Docker, Kubernetes, LXC/LXD, Podman, and Rkt are just a few of the most famous containerization tools available today. Each tool offers unique features and advantages, so it is essential to evaluate your specific needs before choosing a tool.

iot

Top 10 Open Source IoT Platforms for Building Smart and Connected Applications

Opensource IOT Platforms

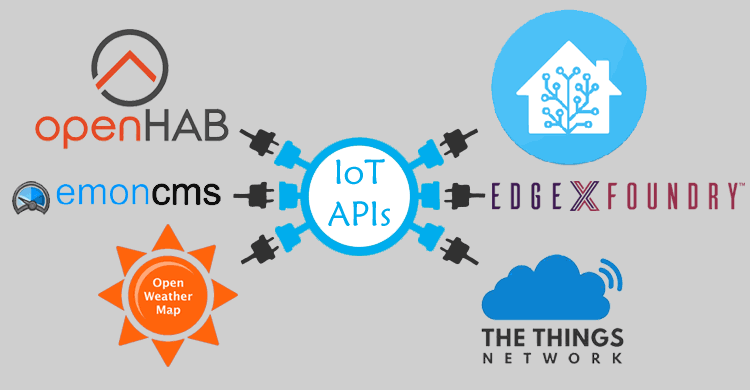
The Internet of Things (IoT) is rapidly growing and has become an integral part of many industries. IoT platforms are essential in connecting devices and managing data generated by IoT devices. Open source IoT platforms have gained popularity due to their flexibility, customization, and community support. Here are the top 10 open source IoT platforms:

  1. Eclipse IoT: Eclipse IoT is an open source IoT platform that provides a set of tools and frameworks for building IoT applications. It includes several projects that cover different aspects of IoT, such as device management, data management, and connectivity.
  2. Kaa IoT: Kaa IoT is an open source platform that provides a set of tools and frameworks for building IoT applications. It includes several projects that cover different aspects of IoT, such as device management, data management, and connectivity.
  3. Thingsboard: Thingsboard is an open source IoT platform that provides a set of tools for building IoT applications. It includes features such as device management, data visualization, and device control.
  4. OpenHAB: OpenHAB is an open source home automation platform that provides a set of tools for building smart home applications. It includes features such as device management, data visualization, and automation.
  5. Home Assistant: Home Assistant is an open source home automation platform that provides a set of tools for building smart home applications. It includes features such as device management, data visualization, and automation
  6. Node-RED: Node-RED is an open source IoT platform that provides a visual programming interface for building IoT applications. It includes features such as data transformation, data visualization, and device control.
  7. MyDevices Cayenne: MyDevices Cayenne is an open source IoT platform that provides a set of tools for building IoT applications. It includes features such as device management, data visualization, and device control.
  8. OpenMTC: OpenMTC is an open source IoT platform that provides a set of tools and frameworks for building IoT applications. It includes features such as device management, data management, and connectivity.
  9. FIWARE: FIWARE is an open source IoT platform that provides a set of tools and frameworks for building smart city applications. It includes features such as device management, data management, and connectivity.
  10. FIWARE: FIWARE is an open source IoT platform that provides a set of tools and frameworks for building smart city applications. It includes features such as device management, data management, and connectivity.

In conclusion, open source IoT platforms offer a range of tools and frameworks for building IoT applications. They provide flexibility, customization, and community support, making them a reliable choice for organizations looking to invest in IoT technology. The platforms discussed in this post are continuously evolving and improving, and can be used for various IoT use cases such as home automation, smart cities, and industrial automation

Blog Images_Internal_Top Benefits of Cloud Computing Blog-1

Exploring the Top Open-Source Cloud Platforms for Building and Managing Private and Public Cloud Infrastructure

Opensource Cloud Platform

The use of cloud platforms has been growing rapidly in recent years, as organizations of all sizes turn to the cloud to achieve greater flexibility, scalability, and efficiency. While there are many proprietary cloud platforms available, open-source cloud platforms have gained popularity due to their flexibility, cost-effectiveness, and community support.

In this blog post, we’ll explore the top open-source cloud platforms for building and managing private and public cloud infrastructure.

Open-source cloud platforms are a cost-effective and flexible solution for organizations looking to build and manage their own cloud infrastructure. They provide a range of services and tools that enable organizations to create, deploy, and manage virtual machines and containers in a scalable and efficient manner.

In this blog post, we’ll explore the top open-source cloud platforms for building and managing private and public cloud infrastructure.

  1. OpenStack : OpenStack is one of the most popular open-source cloud platforms available. It provides a comprehensive set of services for creating and managing private and public clouds, including compute, networking, storage, identity, and more. OpenStack is highly customizable and can be used to build clouds of any size, from small private clouds to large public clouds.
  2. Kubernetes : Kubernetes is an open-source container orchestration platform that automates the deployment, scaling, and management of containerized applications. It provides a powerful and flexible way to manage containerized workloads in a cloud environment. Kubernetes is highly scalable and can be used to manage large, complex workloads.
  3. Apache CloudStack : Apache CloudStack is an open-source cloud platform that provides a set of services for creating and managing private and public clouds. It includes services for compute, networking, storage, and more. CloudStack is highly scalable and can be used to manage large, complex clouds.
  4. OpenNebula : OpenNebula is an open-source cloud platform that provides a set of services for creating and managing private clouds. It includes services for compute, networking, storage, and more. OpenNebula is easy to install and use, and is designed for small to medium-sized deployments.
  5. Eucalyptus : Eucalyptus is an open-source cloud platform that provides a set of services for creating and managing private clouds. It includes services for compute, networking, storage, and more. Eucalyptus is compatible with Amazon Web Services (AWS) APIs, which makes it easy to move workloads between Eucalyptus and AWS.

In conclusion, open-source cloud platforms are a cost-effective and flexible solution for organizations looking to build and manage their own cloud infrastructure. The platforms discussed in this post provide a range of services and tools that enable organizations to create, deploy, and manage virtual machines and containers in a scalable and efficient manner. With the help of the open-source community, these platforms are continuously improving and evolving, making them a reliable choice for organizations looking to invest in cloud technology

Linux_file_system

Linux File Systems and Directory Structures

If you’re new to Linux, the file system and directory structure can be daunting. However, it’s important to understand these concepts to effectively manage files and directories on your system. In this article, we’ll explain the Linux file systems and directory structures in detail, including the different types of file systems and the most important directories.

Table of Contents:

  1. Introduction
  2. Linux File Systems
  3. Inodes and File Allocation
  4. Types of File Systems a. ext4 b. Btrfs c. XFS d. JFS
  5. Linux Directory Structure
  6. Root Directory
  7. Subdirectories
    • a. /bin
    • b. /boot
    • c. /dev
    • d. /etc
    • e. /home
    • f. /lib
    • g. /mnt
    • h. /proc
    • i. /usr
    • j. /var
  8. Conclusion
  9. Introduction:

The Linux file system and directory structure are organized in a hierarchical tree structure, with the root directory at the top. The file system is responsible for storing and organizing files and directories, while the directory structure provides a logical organization of the files and directories.

  1. Linux File Systems:

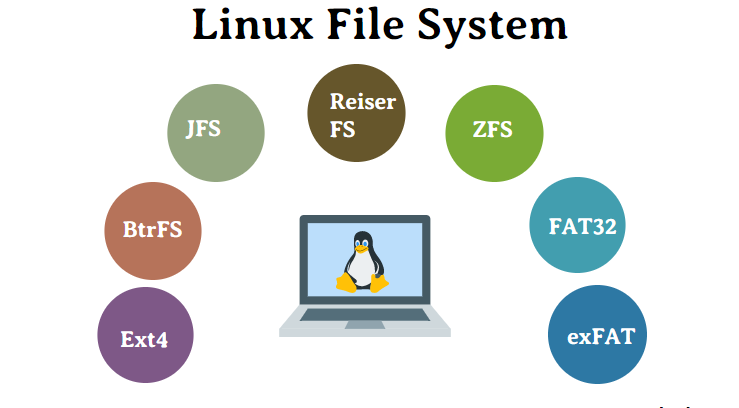
The most commonly used file system in Linux is the ext4 file system, known for its stability and performance. However, other file systems such as Btrfs, XFS, and JFS are also used in Linux, each with its own set of rules for organizing and accessing files and directories.

  1. Inodes and File Allocation:

The ext4 file system uses an inode-based system to keep track of files and directories. Inodes are data structures that contain information about files and directories, including ownership, permissions, and location on the hard drive. The file allocation table (FAT) is used to map the file system blocks to the inodes.

  1. Types of File Systems:
Linux File Systems

a. ext4:

The ext4 file system is the default file system in many Linux distributions. It’s known for its reliability and performance, with support for large file systems and up to 16 terabytes of data.

b. Btrfs:

Btrfs is a modern file system designed to provide improved data management and reliability. It uses a copy-on-write system to optimize data management and provides features such as snapshotting and compression.

c. XFS:

XFS is a high-performance file system designed for use with large files and high-speed networks. It provides support for large file systems and high-speed file transfers.

d. JFS:

JFS is a file system developed by IBM and designed for use with high-performance computers. It provides support for large file systems and can handle high-speed file transfers.

  1. Linux Directory Structure:

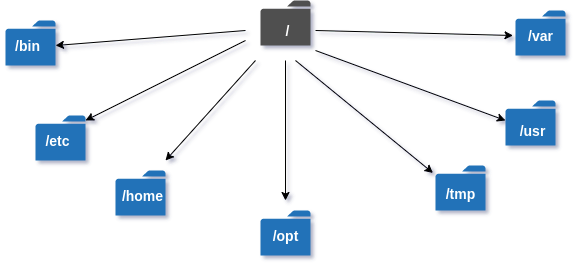
The Linux directory structure is organized in a hierarchical tree structure, with the root directory at the top. All other directories are subdirectories of the root directory.

Linux Directory Structure
  1. Root Directory:

The root directory is denoted by a forward slash (/) and is the top-level directory in the Linux file system. It contains all other directories and files on the system.

a. /bin:

The /bin directory contains essential user binaries (executable programs) that are required during booting, repairing, and single-user mode operations. These binaries are available to all users and are usually stored in the system’s root file system.

Some of the important binaries found in the /bin directory include commands like cat, ls, cp, mv, mkdir, rmdir, etc.

b. /boot:

The /boot directory contains files required for booting the system, including the kernel, initial ramdisk, and bootloader configuration files.

The kernel is the core component of the operating system that manages system resources and communicates with the hardware. The initial ramdisk (initrd) is a temporary file system that contains essential system files and drivers required to boot the system. The bootloader configuration files are used to configure the bootloader, which is responsible for loading the kernel and initrd files during the boot process.

c. /dev:

The /dev directory contains device files that represent hardware devices connected to the system, such as disks, partitions, printers, and network interfaces.

Device files are special files that provide an interface for user applications to communicate with the hardware devices. For example, the device file /dev/sda represents the first disk on the system, and applications can read and write to this file to access the disk’s contents.

d. /etc:

The /etc directory contains configuration files for the system and applications installed on it. These files are usually plain text files and are editable by the system administrator. The /etc directory is an important directory as it contains many critical system configuration files, including /etc/passwd, /etc/group, /etc/fstab, /etc/hosts, and /etc/resolv.conf.

e. /home:

The /home directory contains the home directories for all user accounts on the system. Each user has their own subdirectory in /home, which is used to store their personal files and settings.

f. /lib:

The /lib directory contains essential shared libraries used by system utilities and programs. These libraries contain code that is used by multiple programs, which helps to reduce duplication and improve system performance.

g. /mnt:

The /mnt directory is used as a mount point for temporary file systems, such as CD-ROMs and USB drives. When a removable device is connected to the system, it can be mounted to the /mnt directory using the mount command.

h. /proc:

The /proc directory contains information about running processes and system resources, presented as files and directories. The files in the /proc directory are not actual files, but rather a representation of system information maintained by the kernel.

i. /usr:

The /usr directory contains user binaries, libraries, documentation, and source code for installed software packages. This directory is typically read-only and contains files that are shared among multiple users.

j. /var:

The /var directory contains variable data, including system logs, mail, and print spools. This directory is used to store data that changes frequently during the system’s operation. It is important to monitor the usage of the /var directory, as it can quickly fill up if logs and other data are not periodically purged.

  1. Conclusion:

Understanding the Linux file system and directory structure is essential for managing files and directories on a Linux system. By learning about the different types of file systems and directories, you’ll be able to effectively organize and manage your files and directories. We hope this article has provided you with a better understanding of these concepts and how they work in Linux.

In conclusion, Linux file systems and directory structures can be complex, but they are essential to effectively manage files and directories on a Linux system. By understanding the different types of file systems and directories, you’ll be able to better navigate and manage your files and directories.

Linux logo

Top 10 Linux Distros in 2024

Linux is an open-source operating system that comes in many different distributions, also known as “distros.” Each Linux distro has its own set of features and advantages, and choosing the right one for your needs can be challenging. Here are some of the most popular Linux distributions and their features:

LINUX DISTROS
  1. Ubuntu

Ubuntu is one of the most popular and widely used Linux distributions in the world. It is known for its user-friendly interface, easy-to-use software center, and a vast repository of software packages. Ubuntu offers two long-term support (LTS) releases per year, which are supported for five years. The latest version of Ubuntu as of March 2023 is Ubuntu 23.04.

  1. Fedora

Fedora is another popular Linux distribution that is known for its bleeding-edge features and technologies. It is designed for desktop and server use and has a six-month release cycle. Fedora includes many pre-installed software packages, including the GNOME desktop environment, LibreOffice, and Firefox. The latest version of Fedora as of March 2023 is Fedora 34.

  1. Debian

Debian is one of the oldest and most stable Linux distributions, known for its reliability and security. It is designed for both desktop and server use and has a massive repository of software packages. Debian has a slow release cycle and offers long-term support for its stable releases. The latest version of Debian as of March 2023 is Debian 11 “Bullseye.”

  1. Manjaro

Manjaro is a user-friendly Linux distribution that is based on Arch Linux. It is known for its easy installation process, user-friendly interface, and pre-installed software packages. Manjaro offers different editions for different desktop environments such as KDE, Xfce, and GNOME. The latest version of Manjaro as of March 2023 is Manjaro 23.

  1. CentOS

CentOS is a Linux distribution that is based on Red Hat Enterprise Linux (RHEL). It is known for its stability, security, and reliability, making it an excellent choice for servers. CentOS is often used by web hosts, and it comes with a large repository of software packages. The latest version of CentOS as of March 2023 is CentOS 8.

  1. openSUSE

openSUSE is a Linux distribution that is known for its stability, ease of use, and flexibility. It is designed for both desktop and server use and includes a vast repository of software packages. openSUSE offers different editions, including Leap and Tumbleweed, each with a different release cycle. The latest version of openSUSE Leap as of March 2023 is openSUSE Leap 16.4.

  1. Arch Linux

Arch Linux is a lightweight and customizable Linux distribution that is designed for experienced users. It is known for its minimalistic approach to software and flexibility. Arch Linux does not come with pre-installed software packages, allowing users to choose what they need. Arch Linux is a rolling-release distribution, meaning that it is continually updated with the latest software versions.

  1. Mint

Mint is a user-friendly Linux distribution that is based on Ubuntu. It is known for its easy-to-use interface, pre-installed software packages, and excellent multimedia support. Mint is available in different editions, each with a different desktop environment, including Cinnamon, MATE, and Xfce. The latest version of Mint as of March 2023 is Mint 23.

  1. Kali Linux

Kali Linux is a Linux distribution that is designed for penetration testing and digital forensics. It comes with pre-installed software packages for ethical hacking and security testing. Kali Linux is a rolling-release distribution, meaning that it is continually updated with the latest software versions.

10. Elementary OS

Elementary OS is a Linux distribution that is known for its sleek and modern design. It is designed for desktop use and comes with many pre-installed applications, including a web browser, media player, and office suite.

images

Uptimekuma : How to install and configure uptimekuma?

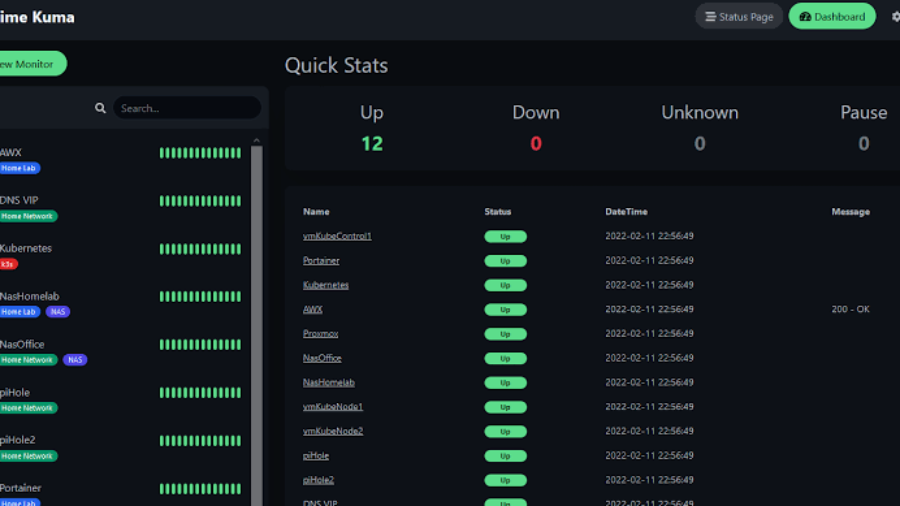
UptimeKuma is an open-source, self-hosted service that provides website and server monitoring. Here are the general steps to install and configure UptimeKuma on a Linux server:

  1. Install the necessary dependencies: UptimeKuma requires Node.js, npm, and MongoDB to be installed on the server. Install them using the package manager of your Linux distribution.
  2. Download and extract the UptimeKuma source code: Download the latest release of UptimeKuma from the official GitHub repository and extract the files to a directory on your server.
  3. Install the Node.js dependencies: Navigate to the UptimeKuma directory and install the required Node.js dependencies by running the following command: npm install
  4. Configure UptimeKuma: Copy the sample configuration file config.sample.js to config.js and edit it to suit your needs. The most important configuration options are the MongoDB connection settings and the email notification settings.
  5. Start UptimeKuma: Run the command npm start to start the UptimeKuma service. By default, it will listen on port 3000.
  6. Set up a reverse proxy: If you want to access UptimeKuma from the internet, it is recommended to set up a reverse proxy with SSL termination. You can use a web server such as Nginx or Apache to achieve this.
  7. Create an admin user: To access the UptimeKuma web interface, you need to create an admin user. Run the command npm run add-admin and follow the prompts to create an admin user account.

Once you have completed these steps, you can access the UptimeKuma web interface by navigating to the URL of your server, followed by the port number (e.g. http://example.com:3000). From there, you can add website and server monitors, view status reports, and configure notification settings.